Features
Scheduling
Auditzy Scheduling feature helps you monitor website performance automatically and get hourly, daily, or weekly reports.
The scheduling feature eliminates manual audits, saving you time while delivering regular website audit reports. Experience convenience and timely insights with our automated scheduling functionality.
Key benefits of using the scheduling feature in Auditzy
By scheduling an audit, you can break free from the need to manually conduct audits regularly. This lets you concentrate solely on achieving results.
Enhanced Efficiency: By automating audits at your preferred intervals (such as hourly, daily, or weekly), you can optimize your workflow and reduce the need for manual intervention.
Time Savings: Scheduling audits eliminates the need for labor-intensive manual audit tasks, saving you valuable time and effort that can be redirected towards more strategic activities.
Timely Insights: With scheduled audits, you can access critical insights precisely when you need them. This ensures you stay well-informed and can make informed decisions promptly.
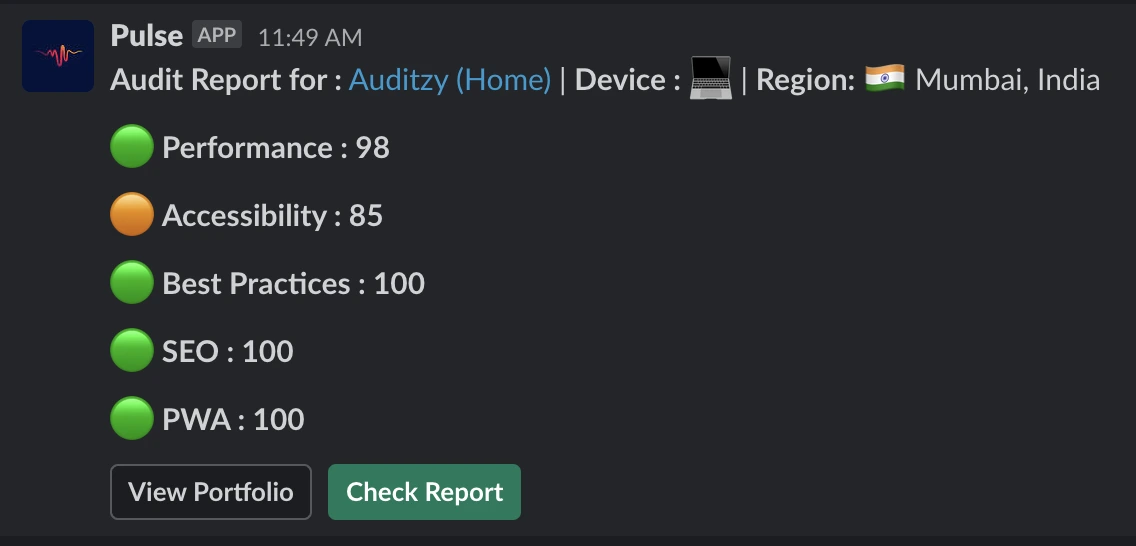
Instant Notifications: ntegration with tools like Slack or email alerts allows you to stay informed as soon as audit tasks are completed. This real-time notification system ensures you receive timely updates on your audit reports, keeping you in the loop effortlessly.
How to Schedule Audits?
There are currently 3 ways to schedule audits in Auditzy:
1. Schedule from the Scheduling Tab
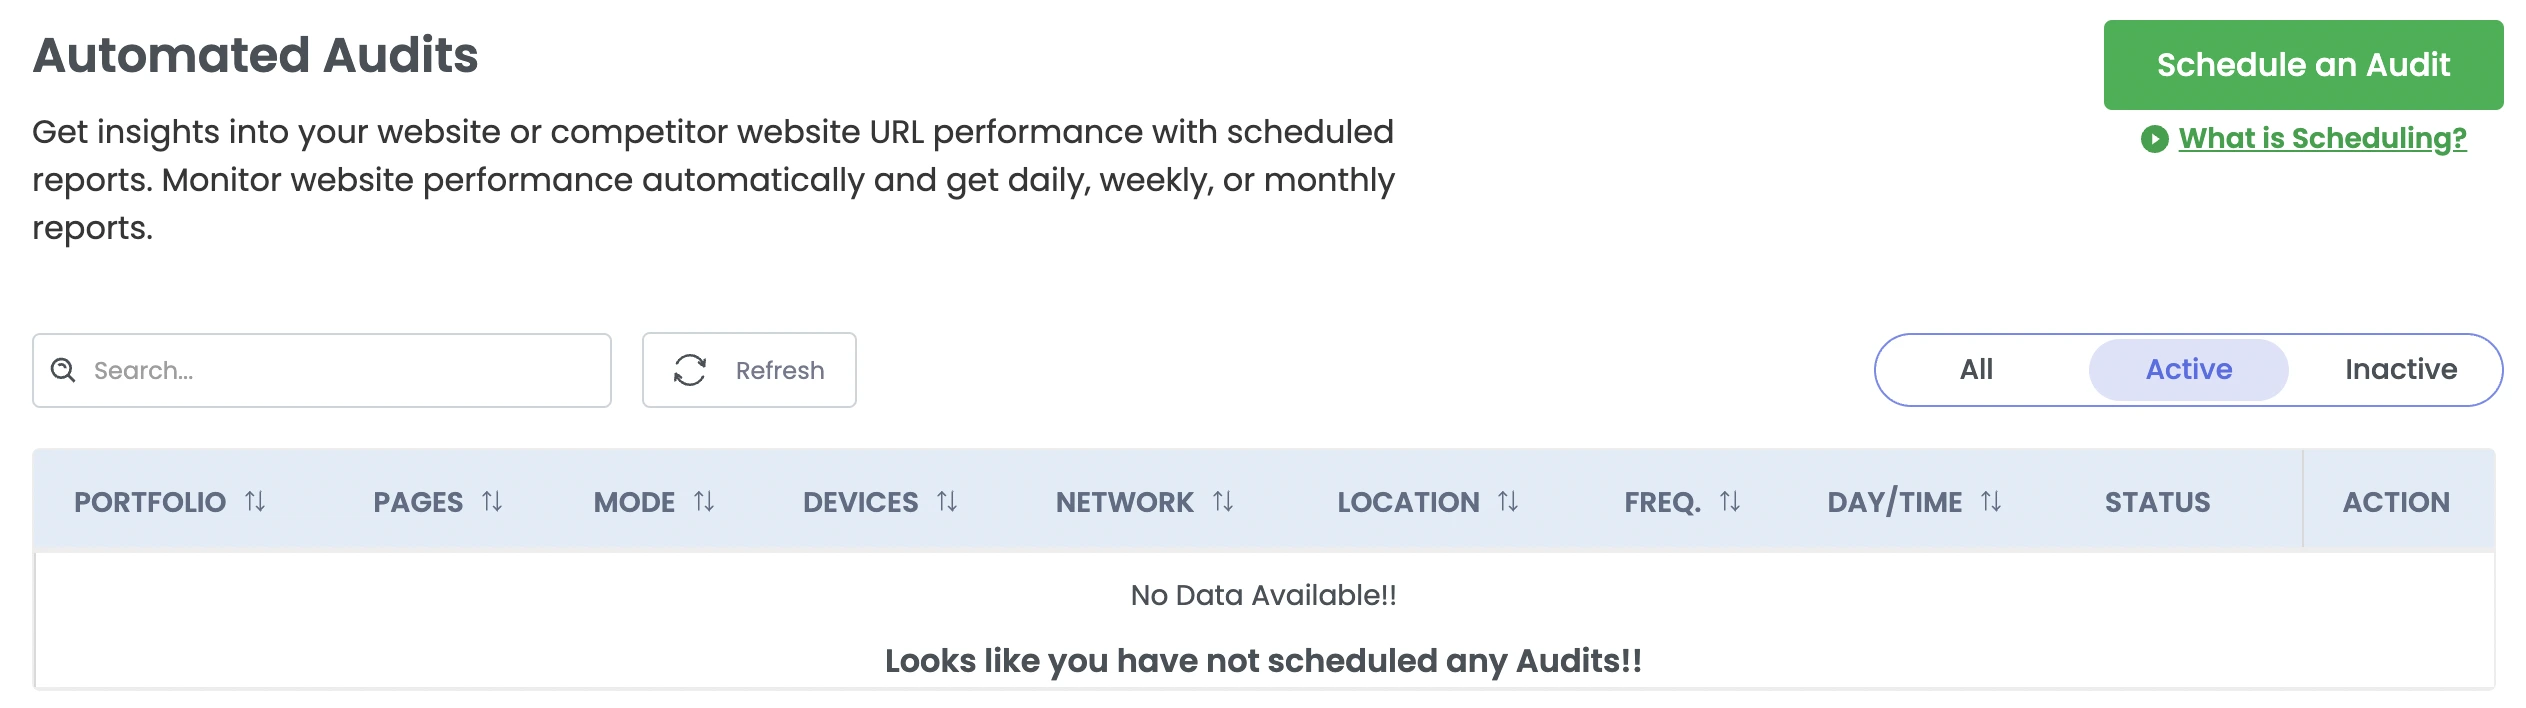
To get started just head over to the Auditzy app and click on the Audit menu on the left sidebar and the Scheduling option inside the Audit menu.
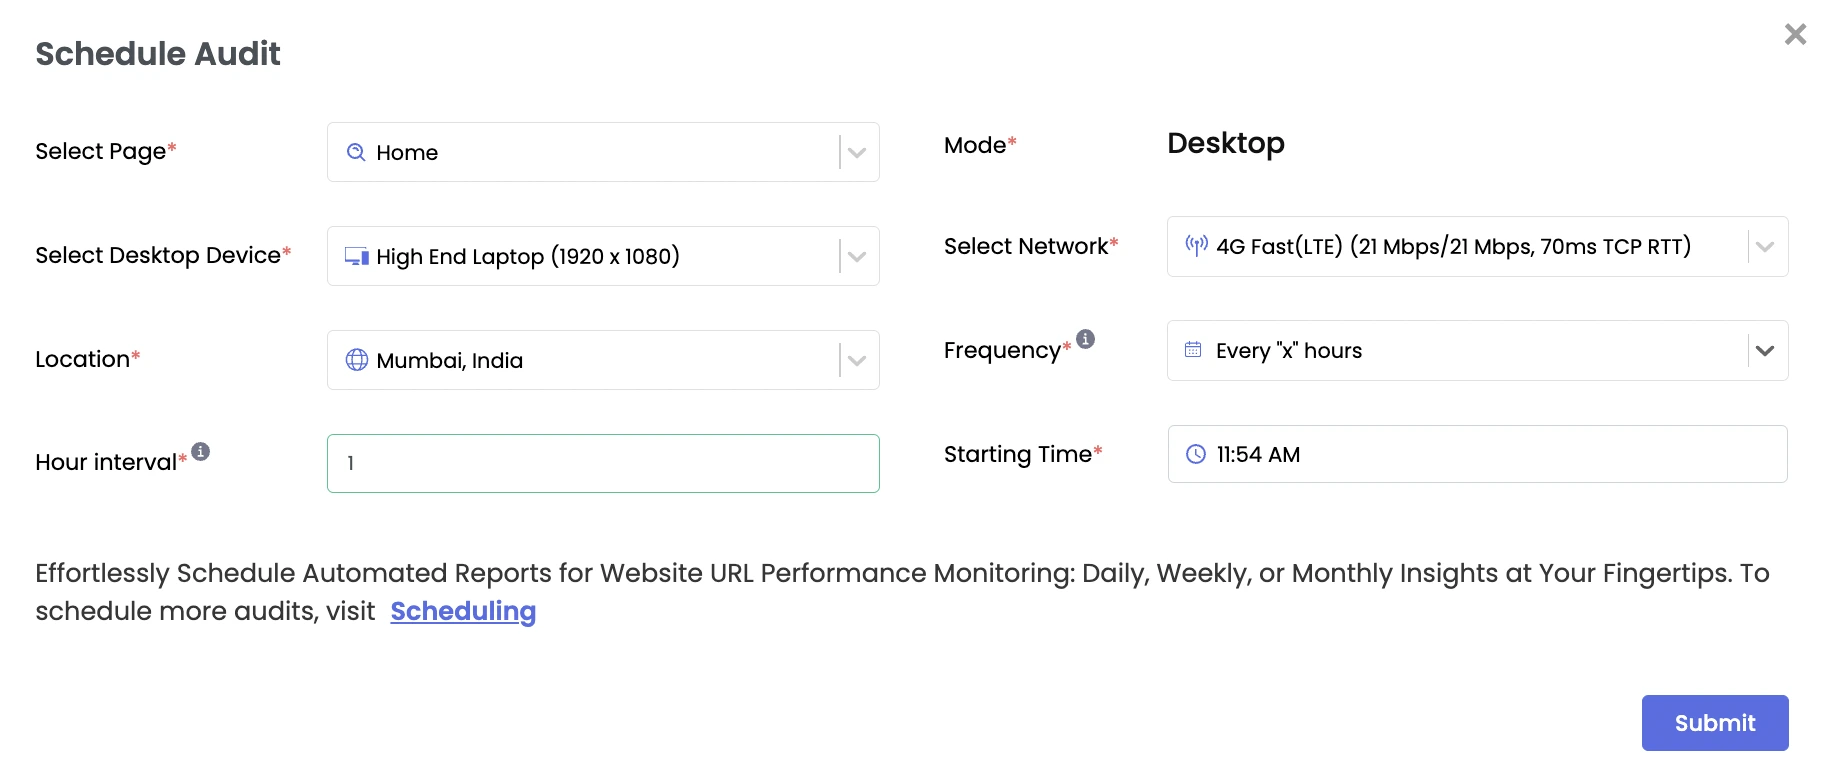
- Click the Schedule an Audit button.
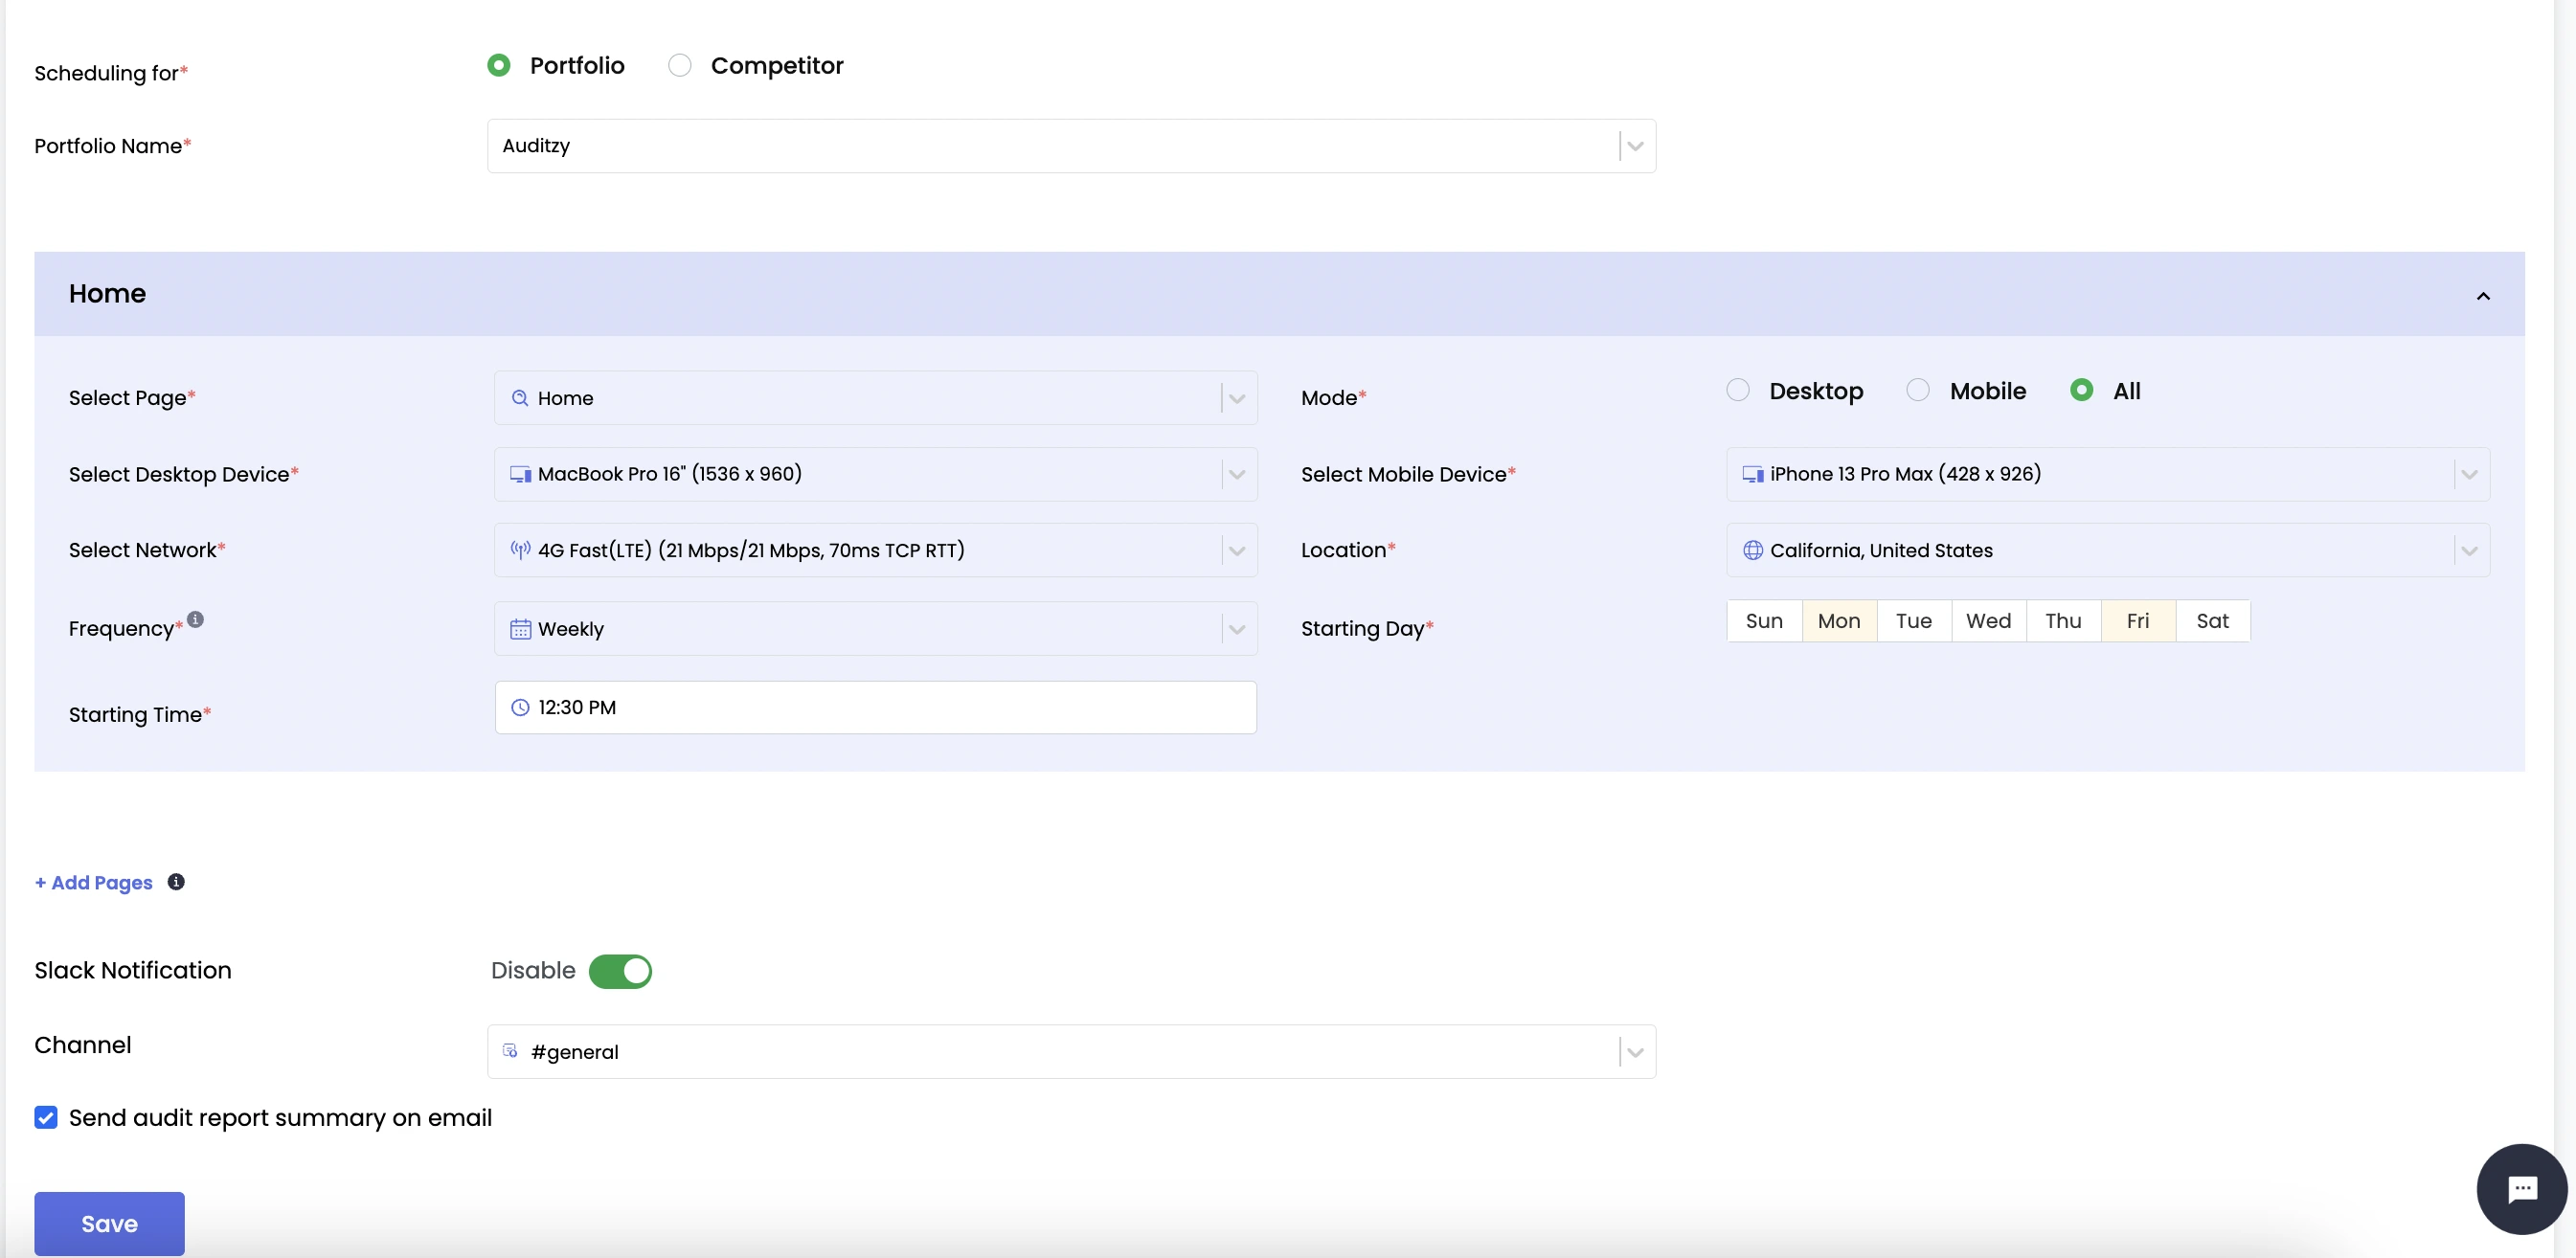
- Select Portfolio/Competitor and provide the required details.
- Choose your preferred Frequency and set the Audit run time.
- You can schedule multiple pages by Add Pages button
- Additionally, you have the option to receive Audit Report Summaries via both Slack and Email Notifications every time a Scheduled Audit is completed. To enable Slack notifications, choose a Channel to receive the reports.
- Click on Save
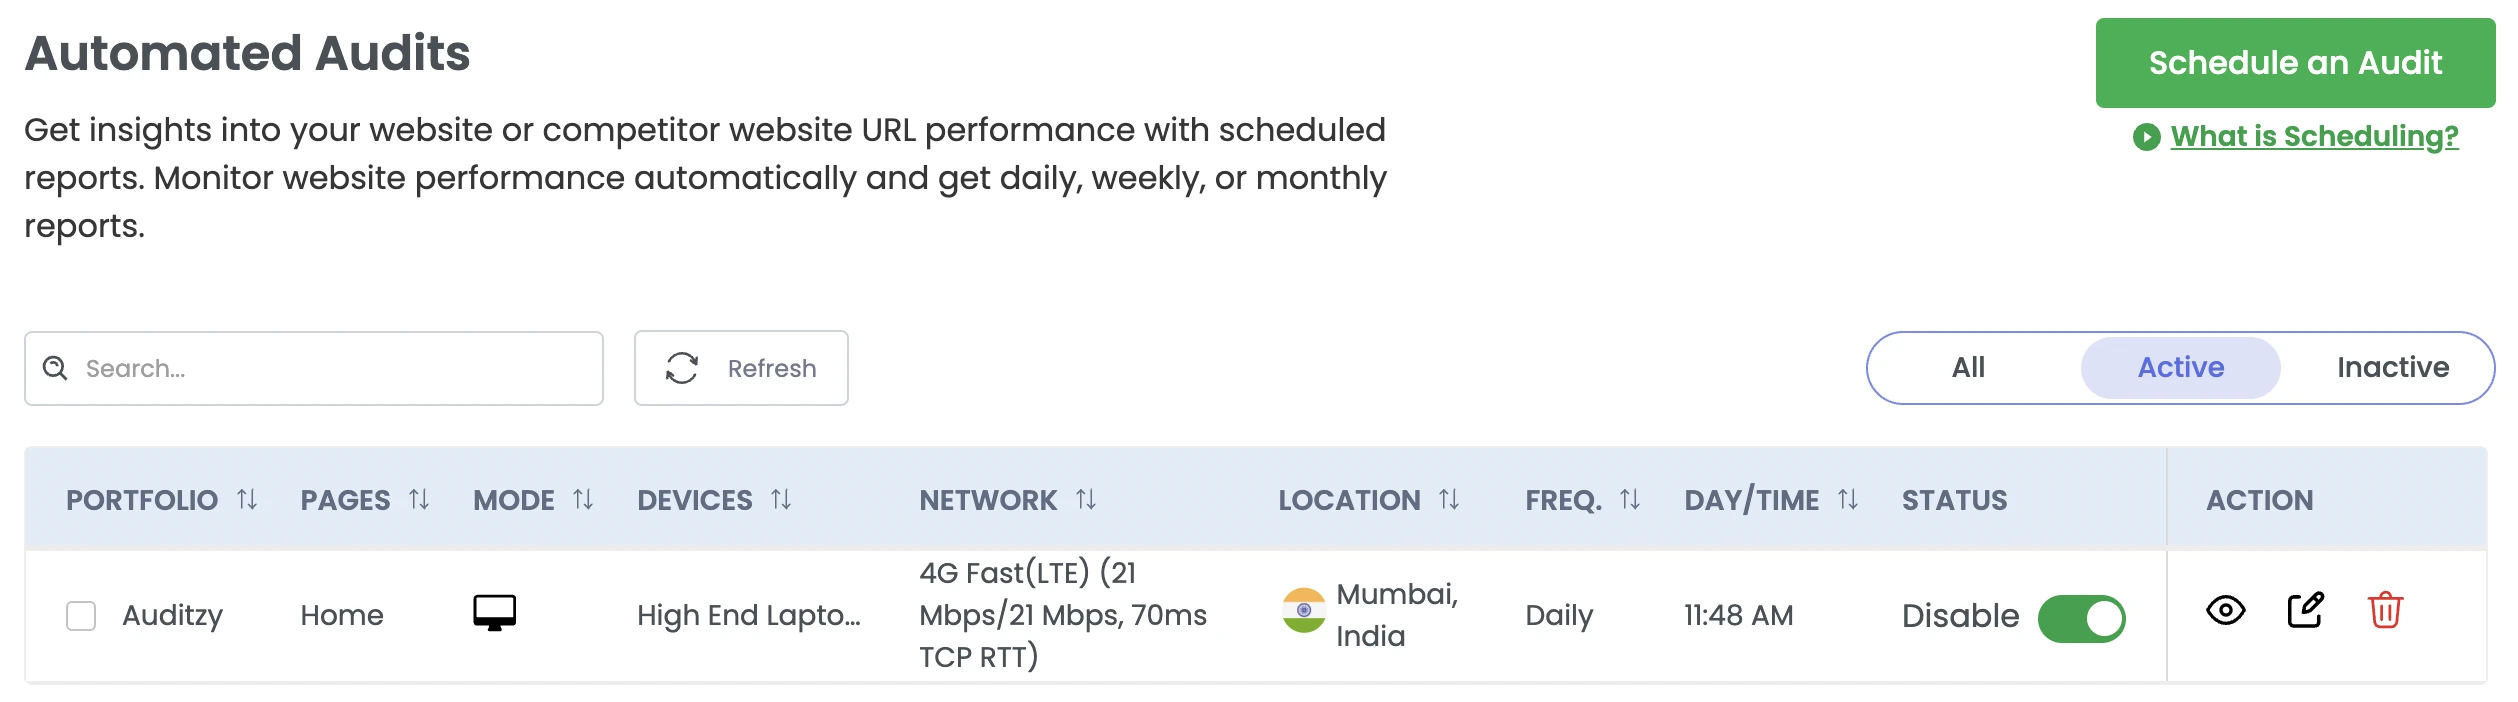
- Once you've saved your schedule, you will be redirected to the Scheduling listing page where you will be able to see all your schedulings.
Enabling Slack notifications requires adding a Slack Channel. If you haven't connected a Slack channel yet, you can effortlessly do this by accessing the integration feature on the left panel, selecting Slack, and then clicking on Connect Slack.
2. Schedule from the Audit Modal
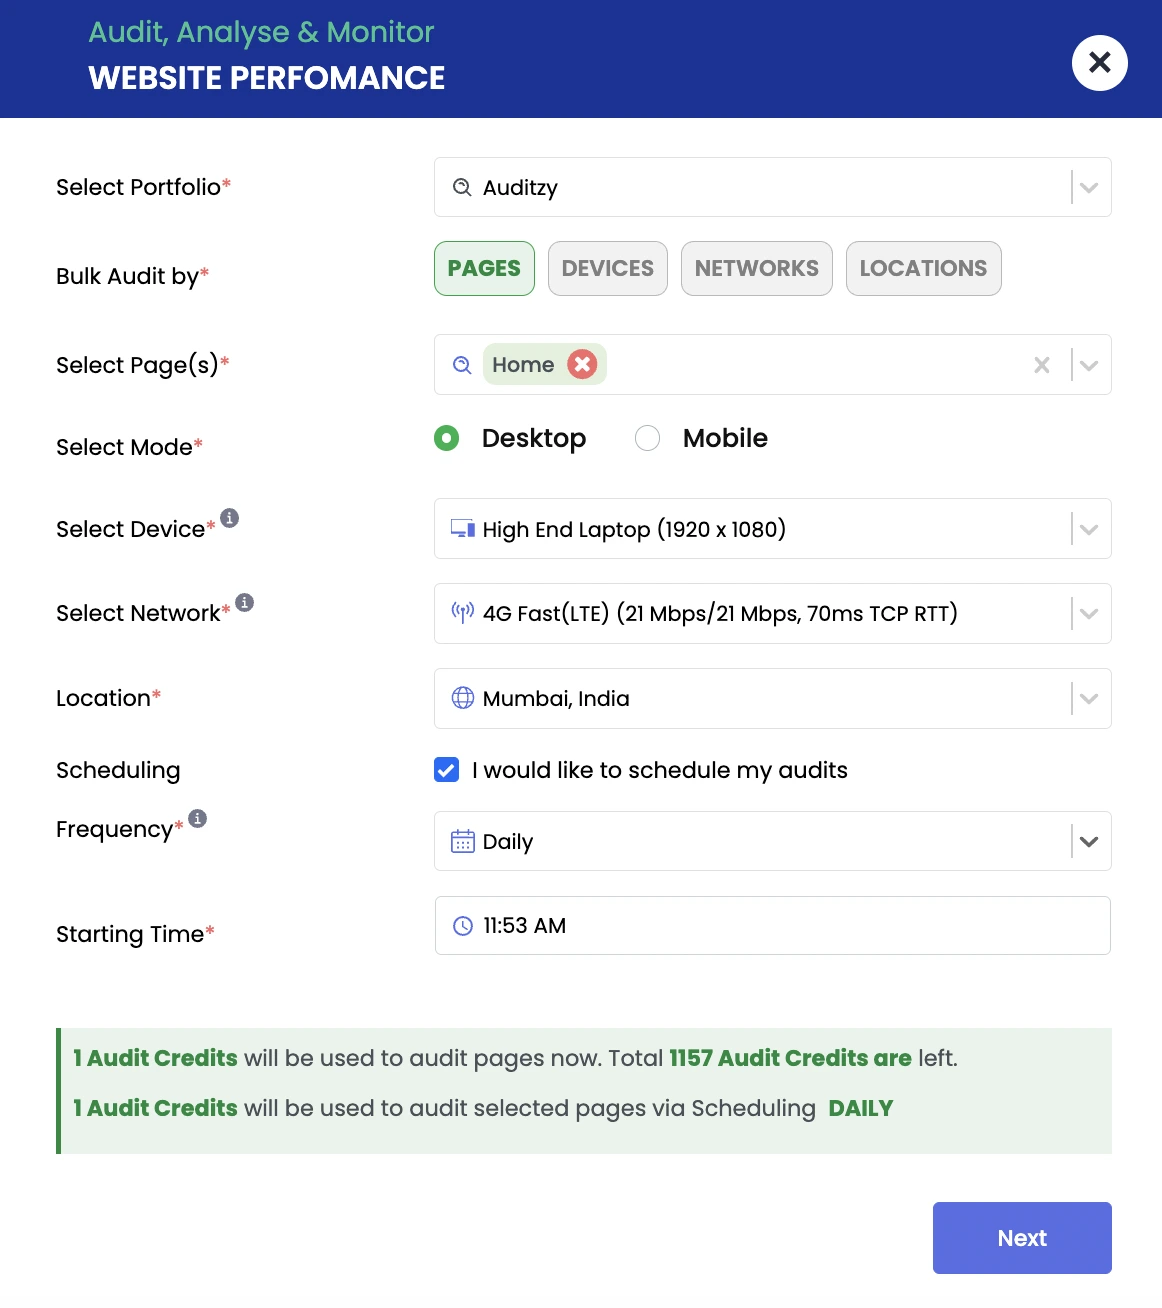
You can also schedule an audit from the Audit Modal. To schedule via this method, try to perform an audit and opening the audit modal.
Select I would like to schedule my audits option and fill in the frequency (Daily, Weekly or Every X hours) and time details and click Next.
We also give you an idea about how many audit credits will be used based on the scheduling configuration you have selected.
3. Schedule from the Audit Report Details
Another option to schedule an audit is from inside the Audit Report Details page. Click on the Audit button on the top right and select Schedule Audit option.
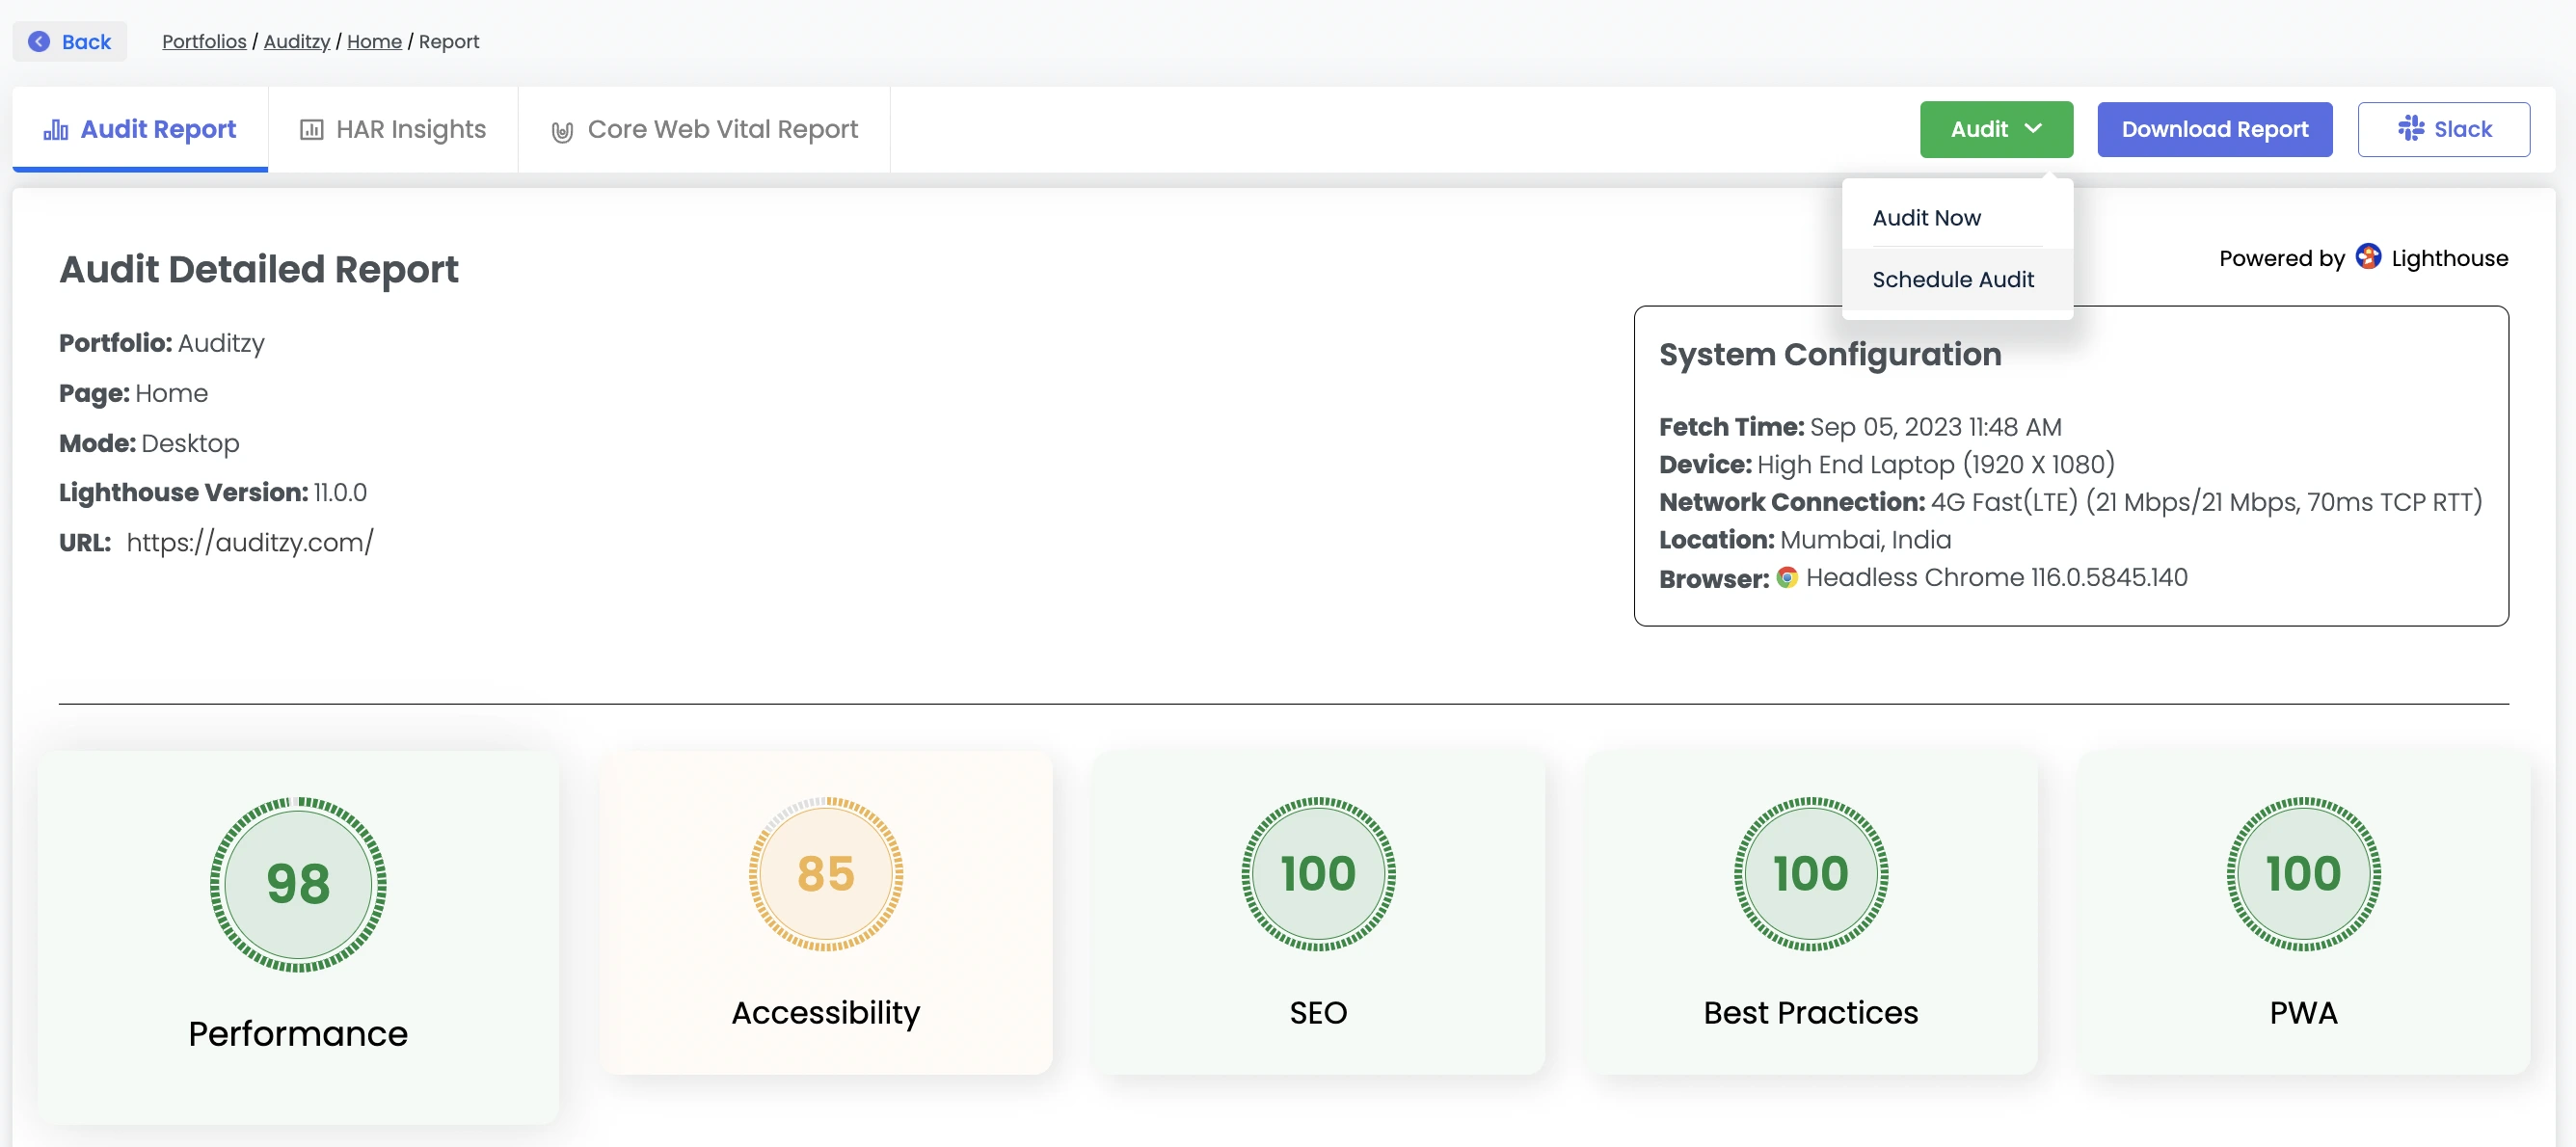
It will open a modal where you will be prompted to fill in the frequency (Daily, Weekly or Every X hours) and time details. Once selected, click on the Submit button.
Viewing the Report
Once the report is generated you can view the report by clicking on the Eye Icon (View Report) button, which will give you Desktop/Mobile filtered list of past generated scheduled audits.
Click on the Last Audit Report button to view the detailed report.

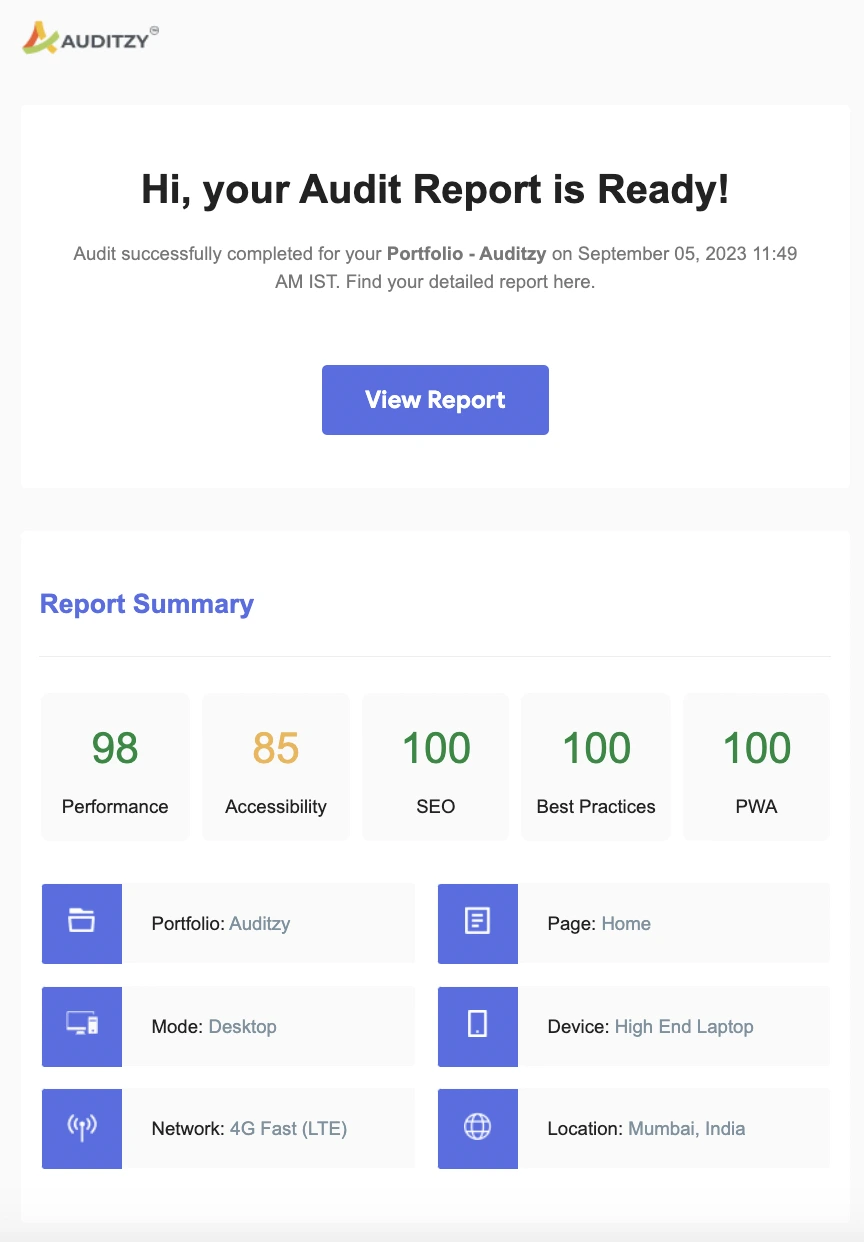
If you have enabled Slack and Email notifications for your scheduled audits, you will receive a notification on your configured Slack channel and Email address every time a scheduled audit is completed.
Different Actions to manage your Schedulings
1. Status
Adjusting the schedule status is flexible to your requirements. By disabling it, you can pause the schedule, halting automatic audits from taking place.
2. History
The eye icon under the Action for a Schedule serves as the History button. This section contains a record of all performed audits, allowing you to access and view reports for each individual audit.
3. Edit Schedule
The Edit Schedule button provides the option to modify your schedule settings. Note that you can edit all aspects of the schedule except for the page selected under a specific portfolio. While other data can be adjusted to match your preferences, the portfolio and page details remain unchanged for that particular configuration.
4. Delete
The Delete button in the action menu allows you to remove the chosen schedule. Keep in mind that you cannot delete an enabled schedule, and deleting a schedule will also erase all associated reports and audit records. Please proceed with caution and consider these factors before deleting a schedule.
Got Questions or Need Help??
Do you have inquiries or need assistance specifically related to Auditzy's Scheduling feature? Interested in a product demo to explore how Scheduling works? Our support team is here to provide the guidance you need!
Explore Auditzy Today
Start monitoring your website performance with Auditzy, or run a Free Historical Core Web Vitals Test today.